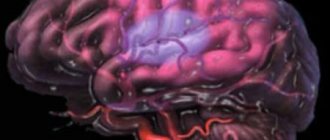
The main processes of recovery after a stroke occur in the first year. However, there is no need to give up any further. Dr. Kirill Rodionov in his new book provides a set of exercises for rehabilitation after a stroke.
The patient and his relatives have a lot of worries and sleepless nights behind them. Treatment in the intensive care unit, in the hospital, is behind us. A painful period of uncertainty passed, when it was still unclear what the prospects for the disease were. And the staff was nearby all the time, procedures were carried out, life was in full swing. Finally, the long-awaited moment comes when the patient feels sufficiently stable and ready to be discharged.
And here the patient and his loved ones may experience a feeling of strange surrounding emptiness. The time when it was necessary to take emergency measures and carry out intensive treatment is behind us. There comes a period of adaptation when the need arises for simpler but regular actions. And here it is appropriate to give an approximate set of exercises that need to be done regularly.
Difficulties in recovery after a stroke
The most difficult stage of recovery lasts the first 6 months. Relatives of patients turn to paid recovery clinics because they are afraid of harming a loved one. To provide proper care, you need to know the specifics of the disease, how and in which specific part of the brain the hemorrhage occurred. In addition, patience and stress resistance are required.
If the patient and his family have a strong desire to restore health and return to their previous life as soon as possible, then a more favorable outcome is likely.
In order to endure a difficult period, the help of a psychologist is necessary, both for the person who has suffered a stroke and for those who care for him. In 90% of cases, patients become withdrawn and develop depression. The person considers himself inferior and also a burden to relatives.
Suicide attempts have been recorded among people who have suffered a stroke.
The main stages of recovery after a stroke
Rehabilitation after a stroke at home is carried out under the supervision of a specialist. The training program depends on the extent of the hemorrhage and the general condition of the patient.
The consequences of a stroke are:
- memory loss (complete or partial);
- speech disorder;
- problems with vision and hearing;
- dysfunction of the vestibular apparatus;
- complete or partial paralysis of the limbs;
- psycho-emotional problems.
The main task is to return a person to normal life. You will have to restore self-care skills, strengthen your memory, and develop your intellect. The rehabilitation program cannot be delayed; recovery must begin as soon as possible. The earlier and more often classes are carried out with the patient, the higher the chance of a complete recovery.
Recovery begins according to the following principles:
- start on time;
- exercise regularly;
- gradually move on to more complex exercises;
- restore all lost skills comprehensively.
The very first steps towards recovery will begin in the hospital, then you need to follow all the rules prescribed by the doctor, as well as gradually increase the level of stress. There should be no omissions; it is necessary to perform the exercises systematically, otherwise the results achieved before the break will be lost again.
You need to follow the lesson plan. Do not overload the patient. If some of the assigned tasks are not yet within his capabilities, he must be patient and not demand that the person complete them.
All organ functionality is restored simultaneously. You need to engage in a variety of activities; if rehabilitation actions are aimed only at restoring the ability to move, then the development of speech and intelligence will stop, and the chances of catching up will become negligible.
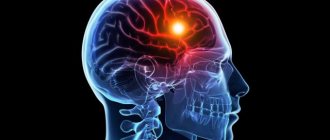
After ischemic stroke
According to world statistics, 85% of strokes are ischemic in nature. One of the vessels becomes blocked by a blood clot or an air membrane, then ruptures and hemorrhages into the brain. Ischemic stroke occurs gradually and can be recognized independently.
During an attack, a person cannot smile; the corners of his mouth twist. Hands do not rise up symmetrically, or do not obey at all. Speech becomes slurred. Prompt assistance will help avoid unpleasant consequences.
Recovery occurs depending on the severity of the “blow.” In 30% of cases, patients do not lose the ability to move and think. Rehabilitators prescribe an exercise program individually.
If speech loss occurs, a speech therapist works with the patient, teaches him to pronounce words correctly and trains his facial muscles. Regular massage treatments are prescribed. They are necessary for influencing the muscles of the limbs and body, as well as for good blood circulation. Nutritionists create a nutrition plan; many foods must be excluded from the diet after an attack.
After a hemorrhagic stroke
Hemorrhagic stroke is more severe than ischemic stroke. It comes suddenly and the person is not able to realize what is happening. Saving the life of a person who has had a hemorrhagic stroke takes seconds. Quickly provided assistance can prevent death.
Usually an attack is caused by a sharp rise in blood pressure. The vessel cannot withstand the load and bursts, causing hemorrhage. Such patients undergo craniotomy and undergo emergency surgery to save lives.
Rehabilitation after a hemorrhagic stroke takes much longer than after an ischemic stroke, both at home and in the hospital. In the first period of recovery, the patient is bedridden and requires careful care. It is necessary to turn his body over to avoid bedsores.
You need to wipe all skin folds, armpits, knees and elbows. The recovery program begins one week after surgery. Until this day, only stroking and light massage of the limbs, fingers and toes are allowed.
Exercises to restore walking after a stroke.
It makes no sense to indicate the number of repetitions, since it depends on the patient’s condition and the complexity of the load (from 4 to 10 repetitions).
1). Sliding your feet on the bed. Lying on your back, legs bent at the knee joints, feet on the bed. Alternately straighten and bend your legs back, starting with the healthy one.
2). Cross-legged. The starting position is the same (lying on your back, legs bent at the knee joints, feet on the bed). 1 - Cross the healthy leg over the “sick” one (just one leg over another). 2 – Return to starting position. 3 – Place the “sick” leg on the healthy one. 4 – Starting position.
3). Heel to knee. Starting position: lying on your back, legs bent at the knee joints, feet on the bed. 1 – Place the heel of the healthy leg on the knee of the “sick” leg. 2 – Starting position. 3 – The same “sick” leg. 4 – Starting position.
4). Leg to the side - on the knee. Starting position: lying on your back, legs bent at the knee joints, feet on the bed. 1 - Place the healthy leg on top of the “sick” leg. 2 – Take the same (healthy leg) to the side and lower it to the bed so that there is a full range of motion. 3 – Place the healthy leg on top of the “sick” leg again. 4 – Return to starting position. Repeat the same with the sore leg.
5). “Bicycle” with each leg, starting with the healthy one.
6). Feet in - out. Lying on your back, legs straight and shoulder-width apart. Turn your feet with your toes inward, then turn your feet with your toes to the sides.
7). Sliding the heel along the front surface of the shin. Lying on your back, legs straight. 1 – Place the heel of the healthy leg on the shin of the “sick” leg closer to the knee joint. 2 – 3 — Slide the heel along the front surface of the shin to the foot of the “sick” leg and back. 4 – Return to starting position. Repeat the same with the “sick” leg.
8). Raising a straight leg. Lying on your back, legs bent at the knee joints, feet on the bed. Straighten your healthy leg, sliding your foot along the bed. Raise and lower it several times, then return to the starting position. Do the same with the “sick” leg.
9). Taking your leg to the side. This exercise can be performed from the starting position lying on your back with both legs straight and knees bent. 1 – take your healthy leg to the side and put it down. 2 – Return to starting position. 3 – 4 – the same “sick” leg.
10). We complicate the previous exercise in the starting position lying on your back with straightened legs. 1 - Take your healthy leg to the side and put it down. 2 – Move the healthy leg onto the “sick” leg, as if crossing your legs. 3 – Move the healthy leg to the side again and lay it down. 4 – Return to starting position. Do the same with the “sick” leg.
eleven). Raising the pelvis. Lying on your back, legs bent at the knee joints, feet on the bed. Raise and lower the pelvis first to a small height, then day by day we increase the height of the pelvis.
12). Flexion of the shins. Lying on your stomach, legs straightened, the foot of the “sick” leg lies on the ankle of the healthy one. Bend and straighten the legs at the knee joints, focusing the student’s attention on the “sick” leg in order to strengthen the sending of impulses. For the “sick” leg, this is a passive exercise.
13). Let's complicate the exercise "Bending the shins." Lying on your stomach, legs straight. Alternately bend and straighten your legs at the knee joints, starting from the healthy side. We moderately help the patient raise the shin of the “sick” leg. We strengthen the sending of impulses: we give instructions to imagine that a heavy weight is tied to the sore leg.
14). Bend the leg to the side. Lying on your stomach, legs straight. 1 – Bend your healthy leg at the knee joint, sliding your knee to the side along the bed. 2 – Return to starting position. 3 – The same “sick” leg. 4 – Starting position.
15). Leg over leg. Lying on your stomach, legs straight. 1 – Move the straightened healthy leg over the “sick” one and touch the bed with your foot. 2 – Return to starting position. 3 – 4 – The same “sick” leg.
16). We place our feet on our toes. Lying on your stomach, legs straight. 1 – Raise your shins slightly and place your feet on your toes (foot extension). 2 – Place your feet back in the starting position.
17). Raise your leg while lying on your side. Lying on your side, healthy limbs on top, legs straight. Raise and lower the straightened healthy leg. Then repeat on the other side, to do this we turn the student onto the “healthy” side.
In the same starting position (lying on your side), bend and straighten your leg at the knee joint, bringing your knee to your stomach, move your straightened leg back, and cross your leg.
18). “Push me with your foot.” The patient lies on his back, the “sick” leg (foot) rests on the chest of the instructor, who, as it were, leans his chest onto the student’s leg. We give the command “And-and-and-one!” At this time, the patient pushes the instructor with his foot, straightening his leg.
19). Turning in bed. We teach how to independently turn in bed not only to restore the skill of turning, but also to strengthen the muscles of the torso. The patient lies on his back, legs are bent, feet are on the bed. 1 - Tilt your knees to the “sick” side, the patient himself makes an effort to complete a full turn to the “sick” side. 2 – Return to starting position. 3 – The same with a turn on the healthy side. Remember that you should not pull on the paralyzed arm due to the weakening of the muscle corset of the shoulder joint.
20). Sitting on the edge of the bed. After we have mastered turning in bed, we train the skill of sitting down on the edge of the bed. After the patient has turned on his side, we lower his legs down from the edge of the bed, the patient pushes off the bed with his hand and straightens up. He won't be able to do this without your help. Start learning to sit down after turning onto your healthy side, as it is easier for the patient to push off the bed with his healthy arm. Sit the student on the edge of the bed so that his feet rest firmly on the floor; they need to be placed at a short distance from each other for the stability of the structure. The patient's body is straightened and leans slightly forward to transfer the center of gravity to the feet so that there is no fall back. (Pause for the patient to adapt to the vertical position, ask if he is dizzy). Then you need to return in the reverse order to the starting position lying on your back, but with your head in the other direction. Now we sit down on the edge of the bed after turning to the paralyzed side. Here you will need more effort to support the student, since it is still difficult for him to sit down after turning to the “sick” side. Again, we create a stable structure so that the patient does not fall: the feet are apart, resting firmly on the floor, the body is straightened and tilted slightly forward. We hold the patient and let him get used to the vertical position a little. Then we will slowly put you back into bed on your back.
21). Getting up. Getting up on the floor from a bed or a chair is a difficult exercise. The patient must not be allowed to fall, as this can not only lead to injury, but also complicate further exercise therapy: he will be afraid to do certain exercises and refuse to walk. Therefore, we teach standing up gradually. Now our student can turn on his side in bed, sit on the edge of the bed, and sit on a chair without support.
We begin to train standing up from the edge of the bed. The patient sits on the edge of the bed, with his feet firmly on the floor. We clasp the patient's chest with our hands, and with our feet we create a strong obstacle for the patient's feet so that they do not move while standing up. We sway together with the patient and help him to stand up a little, lifting his pelvis from the edge of the bed by about 10 cm, we do not linger in this position, we immediately sit him back on the bed. We repeat several times, trusting the student with more and more independence.
Let's complicate this exercise: we train standing up while moving along the edge of the bed in one direction, then in the other direction, from one headboard to the other. First, we move the patient’s legs a little, then we move him a little further than the point where the feet stop on the floor. Then again we rearrange the student’s feet a little and so on. We moved to the head of the bed, sat, rested, and again moved along the edge of the bed, now in the other direction. We strive to ensure that the patient performs the movements himself as much as possible, and try to intuitively hold him less and less.
It is convenient to train getting up either by moving the patient up to the headboard of the bed so that he holds on to it with his healthy hand, or by placing a chair with a high back that the patient can hold on to. We support him and control him so that his feet do not move while standing up. The student is already physically and mentally ready to get up and stand, holding onto support, because we have strengthened the muscles that are involved in standing up. The muscles are still weak, but they can perform the movement. We show him the technique of getting up on ourselves: we sit on a chair sideways to the patient: we swayed a little back (for a “run-up”), then forward with the pelvis lifting off the chair, transferred the weight of the body to the feet and carefully straightened up. We will do this decisively, since it is difficult to get up slowly. We sit down in the reverse order, but slowly: while lowering the pelvis onto the seat of the chair, the body is slightly tilted forward. They sat on a chair and straightened their body without leaning back in the chair. Explain that you need to sit straight and keep your body upright to train your torso muscles.
The most reliable and comfortable support to hold on with your hands is a wall bars. If there is such a possibility, then the patient holds with both hands the crossbar of the wall bars at the level of the shoulder girdle; the “sick” hand can be bandaged to the crossbar with an elastic bandage. The patient can be rolled up to the wall bars on a wheelchair, or he sits on a chair facing the wall bars. The patient stands up and sits down as described above, holding the bar with his hands. Complicating this exercise is possible by reducing the height of the chair: the lower the chair, the greater the load on the leg muscles, the more the arms are straightened. To reduce possible muscle spasticity, we instruct you to exhale while sitting down.
22). Trampling on the spot. Starting position: standing, hold onto a support, legs apart, shoulder-width apart. Transfer the weight of the body either to the healthy or to the “sick” leg, as if swinging slightly to the sides to transfer the weight of the body from one leg to the other (without lifting the foot from the floor). Then we complicate this exercise by lifting the foot off the floor a few cm. When lifting the feet off the floor, swinging to the sides is replaced by raising the legs - walking in place.
Next, we teach you to walk in place, raising your knees high. This also includes heel-to-toe rolls in a standing position, legs together. Let's master the “bicycle” with each leg in a standing position, stepping with one leg first and then back over a low block or stick. Let's practice alternately moving the straightened legs back, placing the foot on the toe, as well as wrapping the shins back (that is, the patient pulls the lower leg back so that the foot is pointing up and the knee joint is pointing down).
23). Leg exercises while sitting on a chair. In the initial position of the patient, sitting on a chair, we train various movements of the legs: rolling from heel to toe, alternately rotating the feet clockwise and counterclockwise, sliding the feet forward and backward with alternating counter movements, the “foot to foot” movement, alternately abducting the legs to the sides, alternately raising straightened legs forward – up, “stepping” while sitting on a chair.
! As soon as the student can move the lower leg backwards, he can begin learning to walk. Not right away, but by warning him in advance that tomorrow (or the day after tomorrow) you will begin walking training. This will help your student mobilize strength for this difficult work. He will worry, worry, think about it, wait for you, imagine how he will walk. This is an additional send of impulses to the leg muscles.
Finally, the long-awaited moment has arrived when the patient will take his first steps. First, do a few exercises for your arms and legs while lying on your back and sitting on a chair, practice standing up, trampling from foot to foot, and moving your shin back while standing and sitting. You already have experience working with post-stroke patients and can choose any exercises to prepare the patient for walking. Don't overwork him. Walking will require a lot of strength.
So, the patient sits on the edge of the bed, feet slightly apart and firmly resting on the floor. You sit next to him on the healthy side in an embrace, the patient clasps your neck with his healthy hand. You need to stand together on the command “And-and-one!” They stood up and straightened up. Now you make a kind of pushing movement with both the body and the hugging arm so that the patient’s “sick” leg moves forward by inertia. At this time, when the “sick” leg moves forward, remind the student to try to make a stepping motion. Next, the patient steps on the “sick” leg, transfers the center of gravity to it, holding on to you with his healthy hand, and moves the healthy leg forward. You push again. The student’s “sick” leg moves forward. And so on.
Having no experience in restoring walking in post-stroke patients, invite an assistant just in case to eliminate possible difficulties. An assistant can help the patient's “sick” leg move. Just don’t move your “sick” leg too far, the step forward should be small.
! You need to train not only walking forward, but also walking backward. With each new step, you need to strive for the patient to make a stepping movement with the “sick” leg. Figure out how to attach a wide band to his foot so that you can use the band to lift his leg so that it bends at the knee joint when lifting.
Once you realize that, despite muscle weakness, the patient still walks, it is a great joy. Congratulations! Well done!
The following describes an idea for the rational recovery of post-stroke patients, as an option if you have the necessary conditions for such activities. Your enthusiasm is required, the patient should not be significantly overweight, it should be adequate, you need free space in the room for classes on the floor, a large carpet and, of course, a physically strong assistant.
The recovery of movements in a post-stroke patient will begin quite quickly if you apply exercises while lying on the floor (on a carpet), which are designed in accordance with the stages of physical development of an infant: lying on his stomach, raising his head, turning from side to side, rolling on the floor from one edge of the carpet to the other, stand in a knee-wrist position, crawl back in a knee-wrist position, then crawl forward, crawl on your belly (lying on your stomach). If everything works out well, then you can gradually include any exercises from the set of exercises for spinal osteochondrosis.
This technique should only be used with an assistant, since this work is very hard on your spine.
After a while, you will see that your student can do more than he could before the stroke.
Let me remind you that you learn to practice all the manipulations on a healthy person who imitates a paralyzed patient, and only then use them on a post-stroke patient.
Another piece of advice: be prepared for the fact that your patient’s intestinal function becomes more active during exercise therapy; he may want to go to the toilet. If you can walk to the toilet and sit on the toilet, then for your patient this is a real holiday, a reward for his work.
Basic principles of stroke treatment
Stroke is generally treated with medication, without surgery. In difficult cases, doctors resort to brain trepanation. If the hemorrhage is too extensive, a catheter is installed to pump out the excess. During the operation, part of the skull bone may be removed and covered with skin.
The first week the person is in the hospital. Doctors carefully monitor the first stage of rehabilitation. When the condition becomes stable, the tests return to normal, and the general condition improves, the person is ready for discharge. Next, his recovery program should be carried out by close people, under the supervision of a neurologist.
Main areas of treatment:
- drug therapy;
- psychologist consultations;
- physiotherapy;
- compliance with dietary requirements;
- physical activity (physical therapy);
One of the main goals of treatment is to reduce the likelihood of another attack. Relapse occurs in 15% of patients during the first 6 months. Repeated hemorrhage can be fatal. To prevent relapses, it is necessary to identify the cause of the disease.
Most often an attack is provoked by:
- high excess weight;
- cholesterol;
- hypertension;
- cardiovascular diseases;
- elevated blood sugar levels;
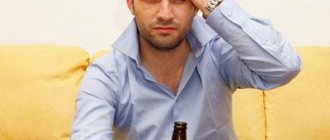
- excessive alcohol consumption;
- smoking.
In addition to these, there are other factors that contribute to the occurrence of stroke. A specialist will determine the exact nature of the origin and give recommendations on how to eliminate this cause.
Use of medications
What medications are prescribed:
- Nootropics are drugs that promote the restoration of neurological processes.
One of the most effective drugs in this group is Gliatilin (choline alfoscerate).
The drug Gliatilin is an Italian original drug based on a unique phosphate form of choline alfoscerate, which allows the active substance to quickly penetrate into brain cells and be better absorbed. After a stroke, it is extremely important to provide timely treatment to the damaged areas of the brain.
A course of use of the drug accelerates the process of recovery of brain cells after a stroke, even in cases of impaired blood circulation or hypoxia. This allows for rapid restoration of memory, thinking, speech, swallowing reflex and restoration of other functions of daily activities.
Gliatilin has a positive effect on the transmission of nerve impulses, protects brain cells from repeated damage, which prevents the risk of recurrent stroke. The drug is well tolerated by patients; it is contraindicated for use in pregnant, lactating women and people with hypersensitivity to choline alfoscerate.
- Anticoagulants - to regulate blood clotting.
- Muscle relaxants - to reduce muscle tone.
- Antidepressants.
- Painkillers.
- Drugs for regulating metabolism.
- Diuretics, as well as anti-edema agents.
- Hypertensive drugs.
- Vasodilators.
- Vitamins.
- Glycine.
If you have suffered a hemorrhagic stroke, you should not take drugs from the group of nootropics and anticoagulants.
Ischemic stroke requires long-term use of medications that improve cerebral circulation. The admission period lasts from 4 to 6 months.
Pain in paralyzed limbs after stroke
Stroke is a life-threatening condition. Patients who have had it cannot feel completely healthy for a long time. For several months they suffer from complications of the disease. For example, a paralyzed arm hurts after a stroke. What is the cause of pain in a paralyzed arm? What are their features? Are there ways to treat and restore a paralyzed arm? These issues will be discussed in this article.
With a stroke, the main complication is paralysis of the limbs. There is a certain pattern in the development of paralysis during a stroke. If the right hemisphere of the brain is damaged, the left side of the body will be paralyzed, and vice versa.
Pain in a paralyzed arm develops due to post-stroke changes in brain structures. They manifest themselves differently according to criteria such as:
- development mechanism;
- intensity;
- time of onset after stroke.
Neurologists believe that pain after a stroke in a paralyzed arm indicates that sensitivity has been preserved in it. This is a good sign, since there is a real chance of restoring her motor functions.
So, why does pain occur in a paralyzed arm? Before answering this question, it is worth paying attention to the nature of post-stroke pain. They can be of central, thalamic origin and are called neuropathic. Peripheral (paretic), or local pain, has a different mechanism of occurrence.
The cause of central pain is disruption of the brain structures. They manifest themselves as tingling and burning in the paralyzed arm. Such pain can vary in intensity and duration. They are most often localized in the fingers. Some stroke patients may experience characteristic sensations in a paralyzed arm or leg for a long time (sometimes years):
- burning;
- severe pain, similar to the passage of an electric current;
- numbness;
- tingling;
- crawling "goosebumps";
- pathological sensitivity to heat and cold.
The last of the signs is diagnostic in determining the neuropathic nature of post-stroke pain.
Peripheral pain
This type of pain in a paralyzed arm occurs during the period of restoration of its function. Since during a stroke the transmission of impulses from the brain to the muscles and ligaments is disrupted, they reduce their tone and stop working. During the restoration of flexion and extension function, which occurs two weeks after the stroke, impulses from the brain begin to flow to the muscles, causing them to contract. Increased muscle tone is felt as a sharp, severe pain.
This is a good sign to activate the restorative functions of a paralyzed arm. Pain occurs when trying to move the arm, which becomes a big problem for the patient.
Treatment
In accordance with the nature of the pain in the paralyzed arm, after the diagnosis, treatment is prescribed.
In the treatment of neuropathic pain, the use of painkillers is ineffective. Therefore, antidepressants and anticonvulsants are prescribed. In combination therapy, opioid analgesics are prescribed along with them. A stable result is achieved after 1-2 months of treatment with these drugs.
Amitriptyline is considered one of the most effective antidepressants, and it should be prescribed immediately after the onset of pain. In some cases, a good therapeutic effect is observed when treated with Cymbalta.
Anticonvulsants are used in the treatment of neuropathic post-stroke pain. Good results are observed after using Pregalbin. It consistently relieves pain, which significantly improves the quality of life of patients taking it for 3-4 weeks.
Paretic pain that develops during the rehabilitation period sometimes becomes an obstacle to restoring the lost functions of paralyzed limbs. Patients are so afraid of these pains that they do not regularly perform prescribed rehabilitation procedures, which is fundamentally wrong.
If the muscles reach a stable spastic state, then it is almost impossible to correct this. Therefore, for such patients, along with drug treatment in the form of a combination of antidepressants, anticonvulsants and muscle relaxants, it is necessary to regularly carry out exercise therapy, massage and physiotherapy.
Muscle relaxants are drugs that bring muscles into a relaxed state. These include a whole group of medications that not only relieve muscle tension, but also pain.
Non-drug treatments include:
- physiotherapy;
- physiotherapy;
- massage.
Physiotherapy
In the treatment of paralyzed limbs after a stroke, physiotherapy is used based on the generation of electric current of varying strength. For example, electrophoresis, which is used to perform electrical stimulation of paralyzed muscles. Laser therapy, magnetic therapy, paraffin and ozokerite treatment are also prescribed.
This type of rehabilitation therapy is effective after an acute period, when the patient’s basic physiological processes have stabilized.
Therapeutic exercises for a paralyzed hand begin with the fingers. At first these are slow movements with a small number of repetitions. The procedure time and intensity increase gradually. Exercises for the elbow and shoulder joints can be started when the patient's body has recovered sufficiently and he can move his arm.
The entire complex of rehabilitation exercises should be carried out under the supervision of a rehabilitation physician.
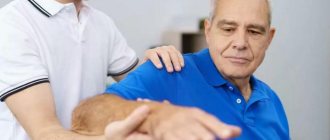
Massage is an integral part of rehabilitation work with paralyzed limbs. It is effective in complex therapy together with medications, therapeutic exercises and physiotherapy.
As a rule, massage is prescribed immediately after the patient’s condition has stabilized. At first, these are short-term and non-intensive sessions. With the development of positive dynamics, the massage increases in time and force of impact. Its purpose is to restore local blood flow in the affected arm and provide muscle stimulation.
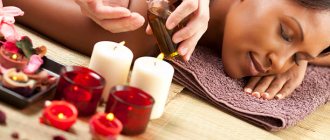
Massage at home
Massage helps restore muscle elasticity, send oxygen to them and speed up the recovery process. At the first stage of recovery, a doctor performs massage. He will select an individual program and calculate the duration of the course, as well as one session.
At first, the massage lasts no more than 5 minutes, because the muscles need to be allowed to get used to the impact on them. Gradually, the procedure time can be doubled, and towards the end of the first stage of rehabilitation, the session duration is 30 minutes.
The massage course lasts about a month, after which a break of 1.5 months is required. Massage begins on the second day after the last attack of ischemic stroke. In case of a hemorrhagic stroke, procedures begin no earlier than 7 days.
Rehabilitation after a stroke at home can be carried out only after the patient has achieved stability and good general condition. Relatives can invite a trained specialist to your home, or perform the procedure themselves.
To help a loved one who has suffered a stroke, you need to learn how to make the right movements. General body massage is done in the direction of the lymph nodes.
The session of this procedure is divided into sequential actions:
- Initial. There should not be a strong impact on the muscles. Only stroking and light rubbing are allowed.
- Basic. Impact-type movements are not allowed, but rubbing and vibration become additional actions that promote the flow of blood and oxygen to the tissues.
- Final. The activity of movements decreases, gradually returning to stroking.
After consultation with a doctor, the use of a vibrating massager may be acceptable. Stroking can be performed along any trajectory. This movement helps relieve the feeling of pain and calms you down. When rubbed, the effect on the skin is stronger. This is necessary to saturate the cells with blood.
Nutrients are distributed faster, lymph is distributed and the ability of muscles to contract is restored. Rub the skin by pressing the edge of the palm tightly against it and moving it forward so that a skin ridge is formed. Vibration is beneficial because with a high amplitude of vibration, relaxation of muscles that are in strong tone is achieved.
The massage should start from bottom to top. First, the feet, legs, and then the thighs are massaged. Hands are stretched starting from the affected side. If the hemorrhage was on the right, then you should start with the right hand. First the hands, then the forearm. Next, the pectoral muscles are warmed up, starting from the affected side.
After the warm-up of the front side of the body is completed, the patient is turned over to the healthy side. The back is massaged in the same way - starting from the bottom. The massage ends with an impact on the lumbar region.
Further restoration of motor activity
Exercises for legs and arms (physical therapy) for patients who are able to sit and stand are characterized by a large number of joints and muscle groups involved in the work:
- alternately lift each limb in a sitting position, followed by straightening the knee joint;
- sitting in bed, rest your hands and try to lift your body a few millimeters from the surface, then slowly lower it;
- lift a small object (cube, matchbox) from the floor, return it to its place with the greatest possible accuracy;
- walk on tiptoe.
It is necessary to focus on the patient’s condition and capabilities. For example, if one side is paralyzed, then you should start with movements of the limbs on the other side, if the paralysis is complete, then with movements of the eyelids.
For men, due to more developed muscles, in the late recovery period, exercises with light weights are recommended, for example, dumbbells weighing up to 3 kg, small weights (you can replace them with water bottles), as well as squats. Such exercises are also suitable for women, but the load should be lighter.
Exercise therapy at home: description of complexes, frequency of classes
Therapeutic exercise helps relieve severe muscle tone, improve blood circulation and gradually restore the ability to control your body. For patients who are completely paralyzed, a method of passive loads has been developed, with the help of another person.
The program to be followed is developed by the doctor. Because necessity or contraindications are based on the extent of the problem, the cause of its occurrence and several other factors.
Basic principles of physical therapy:
- Classes begin with passive load, then smoothly move into more complex exercises.
- At the first stage, you cannot train longer than the prescribed time. There is a risk of overstraining the body.
- If the patient has not lost the ability to move, then gymnastics begins with active sets of exercises. You need to choose them according to the patient’s feelings. If any of the exercises are too easy. Then you should slightly increase the load. If there is a lot of tension, you need to return to the previous level of difficulty of the classes. The body is not yet ready to carry out such loads.
- Repetitions of movements in active gymnastics gradually increase from 1-2 times to 3-4. Then up to 6 repetitions for arms and 14 for legs.
Classes should be held daily without breaks. Stopping classes threatens to lose the results achieved.
Rehabilitation after a stroke at home begins gradually. First, a bedridden patient must again learn to roll over from side to side and stand up in bed. Then he learns to sit down, stand up and move around.
In addition to general gymnastics, you need to develop fine motor skills of your hands. To do this, the patient is asked to collect small objects from the table, sort through cereals or rosaries, and tie shoelaces. In order for the facial muscles to recover, special exercises are needed. For example, puff out your cheeks, form your lips into a tube, blow on windmills.
Therapeutic exercise for bedridden patients
In the very first stage of recovery, the help of a loved one is needed. The patient is not yet able to do the exercises on his own, so he needs help.
Set of passive exercises:
- Flexion and extension of the fingers. The exercise begins on the side where the hemorrhage occurred.
- This is followed by extension and flexion of the hands and feet. After bending, you need to make several circular rotational movements.
- Next, carefully bend the elbow joints and knees. First, one leg is lifted and carefully pulled to the chest, then the other. Limb exercises should always begin on the affected side. They also work with their hands.
- The final stage of gymnastics is the impact on the hip joints and shoulders.
- To remove tone from the muscles of the limbs, you need to hold them in an upright position for several minutes.
When the ability to move is partially restored, you can perform the following exercises while lying down:
- A towel or belt is hung above the bed. The patient should grasp it tightly, squeeze his hands and bend his elbow joints, and lift his body. Over time, you can hang the “simulator” higher.
- Purchase a special rubber and looped tape. Place it on the patient’s arms so that he tries to move them apart, overcoming the tension of the elastic band.
- Stretch with your arms resting on the head of the bed. When pulling up the body, you need to push off with your feet.
When carrying out this complex, you need to gradually increase the number of repetitions. Thanks to these exercises, the ability to move is activated. Soon the patient will learn to lift his body and sit down.
Exercises for patients who are able to sit
When a person learns to sit up in bed, you can proceed to the following complex:
- You need to sit on the edge of the bed with your feet on the floor. Place your hands on the mattress, arch your back, and then return to your starting position.
- The patient sits up in bed, legs remain straight, lie in bed. One leg gradually bends and straightens. Then the second one. This exercise requires some effort. Then you need to raise your straight legs one by one.
- Place a foam roller under the lower back, lie flat, hands at your sides. One leg is raised and bent, bringing it to the chest. Then straighten it and repeat the movement with the second one.
- While sitting in bed, you need to take both arms back, lean on them and gently bend over, throwing your head back.
These exercises strengthen the back muscles and also prepare them for the patient to be able to stand.
Exercises for patients who are able to stand
A set of exercises that need to be performed to prepare the muscles for full walking:
- Stand up leaning on a table or bed and lift small objects from their surface.
- Raise your arms up as you inhale, reaching for the ceiling while standing on your toes. Then, exhaling, relax and return to the starting position.
- Bend over, placing your hands on your waist and your feet shoulder-width apart.
- Perform the hand scissors exercise.
- Swing your legs alternately and clap under your feet.
- Walk in one place, raising your knees high.
While the patient cannot fully walk, he requires a support element, for example, a cane or crutches. For those who have just learned to get out of bed, special “walkers” may be needed.
How to restore walking after a stroke.
We can use passive gymnastics for all joints of the legs and arms with the gradual inclusion of active movements depending on the patient’s condition and his ability to understand you.
The combination of passive gymnastics with elements of massage has a beneficial effect on the nervous system and the appearance of neuromuscular impulses.
! Do not forget about the need to prevent thromboembolism: during exercise therapy, wear elastic stockings or use elastic bandages on the patient’s legs. Leave the tips of your toes open to control blood circulation in the tissues of your feet and legs: your toes should be pink and warm.
Passive leg exercises begin with the feet (flexion, extension and rotation), then continue to the knee and hip joints. The knee joint flexes and extends. The hip joint requires volumetric movements: flexion and extension, abduction and adduction, rotation. It is convenient to perform rotation in the hip joint by bending the patient’s leg at the knee joint and holding the foot with one hand and the knee with the other hand. Passive circular movements in the hip joint are produced in much the same way as in small children with hypoplasia of the hip joints.
During passive gymnastics, we strive to gradually “transform” passive movements into active ones.
As soon as you begin to incorporate active movements, you should have a creative approach, taking into account the individual characteristics of the post-stroke patient, and ingenuity.
The principle of including active movements is based on the activation of the volitional activity of the post-stroke patient.
1). Sending impulses. (Information on the site is sometimes repeated, but this is necessary). The patient mentally imagines any movement in the limbs. First, he performs the movement on the healthy side, remembering the feeling of this movement. Then the same movement is mentally repeated on the affected side. The patient can send impulses independently throughout the day. Mental movements should be simple and short. For example, flexion and extension of the arm at the elbow joint, clench and unclench the hand, raising the straight arm, and so on. The sending of impulses can be strengthened with the help of conscious (mental) weighting of the movement. For example, the patient imagines that there is a heavy dumbbell in his hand or a weight is tied to his leg, and he needs to lift it.
2). During passive gymnastics, tell the patient: “Help me! I will set the amplitude of the movement, and you perform the movement yourself.” You must learn to feel when your student can perform at least part of the movement independently. At this time, without taking your hands off the limb, weaken your impact, let the student make every effort. All movements are carried out at a slow pace.
3). The patient cannot perform full movement immediately. Therefore, you must first master it in parts, then combine the parts of this movement.
Let’s take the “Bicycle” exercise as an example, since it is indicative; all muscle groups of the legs are involved in it. "Bike". Starting position – the patient lies on his back, legs are bent at the knee joints, feet are on the bed. 1 – lift your foot off the bed, the thigh of the leg bent at the knee joint approaches the stomach. 2 – straighten your leg up and forward. 3 – lower the straightened leg onto the bed. 4 – bend the leg, pulling the foot closer to the pelvis, returning to the starting position.
In order for the patient to be able to independently perform the “Bicycle” exercise, we will first master the first part of the exercise, teach him to “step” while lying on his back, alternately lifting the feet of his bent legs from the bed; then we will separately train raising and lowering straightened legs; and also separately - sliding your feet along the bed, straightening and bending your legs with full amplitude. We moderately help the “sick” leg to perform all these movements, day by day weakening our assistance until the patient makes the movement completely independently. We combine all parts of the movement into one whole and rejoice in success. If a student performs an exercise “clumsily,” then we must set the required amplitude in order to achieve a full-fledged, high-quality movement. (We take the limb in our hands, the student works himself, and we control and regulate the amount of movement).
We also master all other desired movements in parts, then combine them into one whole while controlling the quality of the movement.
We are interested in the restoration of walking after a stroke . Therefore, exercises for learning to walk will be listed below. These exercises do not need to be used immediately in one lesson. We gradually restore active movements and gradually complicate the tasks.
All standing exercises must be done with the knee joint protected from backward hyperextension. I recommend purchasing a special orthosis for the knee joint with hinges, which allows you to freely bend and straighten the leg at the knee joint, but eliminates hyperextension of the joint backwards, which occurs due to weakness of the muscles of the paralyzed leg.
This orthosis will be useful to your patient while walking for a long time, since even when movements appear in the leg and the walking skill is restored, muscle weakness remains. If this is not possible, then at least bandage the knee joint with an elastic bandage.
If the paralyzed arm is drooping, be sure to secure the arm with a bandage or use a special arm bandage before the patient assumes a vertical position while sitting or standing.
Physiotherapy
The complex of these procedures does not depend on the nature of the stroke. For hemorrhagic and ischemic strokes, treatment is carried out alone.
What do experts prescribe:
- magnetic and manual therapy;
- massages;
- thermal therapy (mud baths, sand, paraffin, etc.);
- vibration;
- acupuncture (needling);
- electrophoresis.
The duration of the course and the duration of one session are determined by a specialist. At home, physiotherapeutic treatment is provided only by massage. For a speedy recovery, it is recommended to attend all sessions in the hospital.
Speech rehabilitation
The most intensive restoration of speech function is observed in the first six months from the onset of a stroke; it can last up to 2–3 years in case of extensive lesions or untimely treatment. Depending on which areas of the brain are affected, patients experience either a motor or sensory form of speech impairment (aphasia). In the first option, the patient:
- hears speech, perceives it by ear;
- understands words addressed to him;
- responds to requests;
- cannot pronounce a phrase or formulate a thought;
- Difficulties arise when reading and writing, so patients avoid them.
Watch the video about exercises for speech restoration with motor aphasia:
With sensory aphasia, the patient does not pay attention to the speech of others, his own words are incoherent and are not controlled by him. Reading is possible, but the meaning of the continuations is unclear, the writing skill is completely lost. The speech of a person who has suffered a stroke is characterized by insufficient meaningfulness and gesticulation. Since patients try to explain their thoughts to others, but they do not understand, this leads to irritability and resentment.
The following techniques are used for speech rehabilitation:
- cards with written letters, syllables and words from which you need to compose and read a sentence;
- encouragement to communicate - questions, requests, singing together, reciting poetry;
- listening to the patient’s favorite audio books with a retelling of their contents;
- viewing pictures and asking them to describe them.
If speech restoration is carried out at home, then it is important for relatives to maintain a friendly attitude towards even minor attempts to pronounce words, not to correct mistakes, but only to encourage patients. Overcoming a speech defect requires persistence and constant communication with the patient.
Watch the video about exercises for speech restoration with sensory aphasia:
Speech restoration
To restore a person’s ability to speak, it is necessary to develop the facial muscles responsible for producing sounds.
The following exercises will help with this:
- The patient needs to inflate his cheeks and deflate them by pressing them on both sides with his palms. You need to try to gain air by making a small obstacle with your hands.
- Bare your teeth.
- Curl your lips into a tube.
- Lick them with your tongue clockwise and counterclockwise.
- Stick out your tongue.
- Bite your upper and lower lip with your teeth.
- Smile, raise the corners of your mouth up and down, feigning sadness.
Gradually the patient learns to make sounds, pronounce syllables and speak words. Unfortunately, in 50% of severe cases, speech is only partially restored. If this happens, the patient is taught sign language.
In any case, don't despair. We need to continue training. In medicine, many cases have been recorded when a patient, unexpectedly for himself, suddenly began to speak.
How to learn to use a walker
As soon as the patient learns to stand confidently on his feet without support, he can begin to take his first steps. You can’t do this without an assistant, since he must belay from the paralyzed side to prevent a fall.
The patient should place the assistant's hand on the neck and rest his knee on the assistant's knee. Having fixed the joint, you can take the first step.
The assistant’s task is not only to support the patient, but also to control the correctness of his gait. When the patient moves with the help of a walker, it is necessary to ensure that the placement of the foot, rotation of the knee and hip joint are correct.
WE RECOMMEND SEEING: What kind of surgery is done for a stroke?
The whole process has several features:
- The patient cannot fully grasp the assistant's hand, since it is weakened.
- To take a step, he needs to throw his leg forward, which leads to the helper's leg catching.
- It is much more convenient to support the patient from a healthy part of the body, but the knee joint will not be fixed and the patient will not be able to hold on to the wall with his healthy hand.
The main purpose of using a walker is to gain the ability to bend the leg in all joints, otherwise the patient will constantly cling to the floor with his foot. The assistant should remind the person that the leg should be raised higher and bent at all joints.
High boots that fix the ankle joint will help facilitate movement. The affected arm should be secured with a scarf so that it does not sag during movement and the head of the humerus does not come out of the socket. During exercise, you should monitor the patient’s heart function and give him rest.
Once the patient can move with the help of a walker without assistance, he or she can begin to walk independently. This is done with the help of a cane, holding on to the walls, moving a chair in front of you. But it is important to ensure that the load is evenly distributed. You cannot spare the sore leg by relying more on the healthy one.
Memory recovery
Those caring for a person who has suffered a stroke should be patient because memory takes a long time to recover. However, regular exercise brings positive results. At the first stage of recovery, a person may not remember his relatives and his own name. This phenomenon is especially common in those who have suffered a hemorrhagic stroke.
What exercises will help restore memory:
- Memorizing words.
- Board games.
Board games help rehabilitate the brain after a stroke - Playing cards with different images. You can look for paired or opposite designs.
- Memorizing short poems.
- Remembering what you have done during the day is considered an effective exercise.
Those patients with whom they communicate regularly have a favorable prognosis for memory. You can show the patient a family album and remind him of relatives, his childhood and various important events.
Restoring fine motor skills
How to help a patient regain the ability to work with small objects:
- Let him sort out the rosary.
- Collect pictures from cereals. To do this you will need plasticine, cardboard and buckwheat or other cereals. Draw an outline on the cardboard and fill it with smeared plasticine. The patient should take the grains and press them into plasticine.
- Thread the pasta onto a thread. When the results begin to improve, you can use beads or buttons.
- Collect small objects from the bed or table.
- Pick up coins from a smooth surface.
The successful development of fine motor skills gives a prognosis for the safe and rapid restoration of other body functions.
Nutrition after stroke
Rehabilitation after a stroke at home includes a special nutrition program. Patients should not eat fatty, spicy and fried foods. You should limit your intake of salt and sugar.
Strong drinks such as tea or coffee are prohibited. Alcohol and smoking are prohibited not only during the recovery process, but also for the rest of your life. If bad habits return, there is a possibility of relapse with a fatal outcome.
Below is a table of replacing harmful foods with healthy ones:
| Harmful | Useful |
| Butter | Diet margarine |
| Egg | Exclusively protein |
| Chicken meat with skin | Boiled and without skin |
| Ice cream | Yogurt |
| Cottage cheese | Low fat only |
| Vegetable oil | Olive oil |
| Pork | Veal |
| Milk | Pasteurized no more than 3.2% fat content |
| Cheese | Firm low-fat varieties |
| Crackers | Crackers |
It is prohibited to consume sweet confectionery, smoked meats and dried meat. Food should be cooked exclusively by steaming, boiling or baking.
Treatment of stroke with folk remedies: recipes, dosage regimens
Rehabilitation after a stroke at home can be carried out not only with medication, but also with auxiliary folk remedies.
Recipe No. 1
Making a homemade antioxidant.
You will need:
- half a lemon;
- pine decoction.
The skin is cut off from the lemon, the pulp is finely chopped and mixed with a decoction of pine needles. The mixture should sit for 2-3 hours and cool completely. Take half a glass orally before meals, twice a day.
Recipe No. 2
Required ingredients:
- wormwood juice;
- honey.
The components are mixed in a 1:1 ratio. The mixture should be taken orally in a teaspoon 1-2 times a day. But do not exceed the one-time norm – 6 grams. This remedy helps restore memory and also acts as a sedative.
Recipe No. 3
Ointment for paralyzed parts of the body:
- Bay leaf;
- Olive oil.
Bay leaves are ground into powder and mixed with oil until smooth. The ointment is infused for 40 days. After this period, you can rub your immobile limbs with it.
Complete rehabilitation after a stroke at home: what complex will help the patient?
For patients who have suffered a stroke, a mandatory period of rehabilitation is indicated to restore lost skills - walking, speaking, self-care. For this purpose, physical therapy classes, speech and memory training are conducted. They are most effective when combined with dietary nutrition, drug treatment, and supplemented with folk remedies.
Life after a stroke: periods of recovery
Rehabilitation of a patient after an acute cerebrovascular accident involves a gradual increase in loads. First, stabilization of the condition is required.
As a rule, patients are discharged after 20–25 days of hospital treatment.
At home, you can start exercising, provided that you have managed to normalize your blood pressure and pulse rate, and there is no severe weakness or depressive reactions.
Rehabilitation up to 3 months
The early period after a stroke is considered the most important, since at this time the maximum restoration of functions occurs. At this stage it is possible to achieve:
- sitting independently, standing near the bed, going to the toilet, dressing and eating;
- maintaining personal hygiene;
- control over the functioning of the bladder and intestines;
- improved vision and speech;
- the appearance of sensitivity.
With proper treatment, by the end of 2 months the patient can stand on his feet and maintain balance. When walking, support in the form of a walker or stick is required.
It is important to organize physical therapy classes at least 2 - 3 times a day.
The set of exercises consists of sequentially working out all muscle groups on both the healthy and the affected side; a massage is first required to warm up the muscle tissue and eliminate spasm.
Restoring a hand after a stroke
Period up to six months
After self-care skills have been restored (in full or partial), more significant walking training begins. First, with the help of a relative or instructor, and then independently, the patient must confidently move around the apartment and go for a walk.
The first weeks require mandatory support, and in the future it is necessary to ensure the possibility of emergency communication with the patient . It must be remembered that there is no complete guarantee that there will be no relapse of the disease or a sudden fall even after a period of successful recovery.
Initially, short walks and stair climbing are necessary, and by the end of the 6th month it is recommended to abandon devices and outside assistance.
The patient must have full command of cutlery, the ability to write, memorize and reproduce coherent texts.
Therapeutic gymnastics includes weights (light dumbbells, plastic bottles of water, sand bags on the limbs).
Recovery after a stroke up to a year
Walks in the fresh air are becoming longer and longer - from 1.5 to 2 or more hours. They should alternate with rest; overwork should not be allowed. Speech in this period is usually restored or less confused. It is important to develop fine motor skills of the fingers. To do this, they use sewing, knitting, weaving, playing musical instruments, and putting together puzzles.
Up to 18 months, almost 90% of patients can do without assistance, provided they fully comply with medical recommendations:
- daily training;
- proper nutrition;
- taking prescribed medications;
- giving up bad habits;
- control blood pressure, cholesterol and blood sugar levels.
Exercises for rehabilitation after ischemic and hemorrhagic stroke
Physical activity is given the main place in the recovery of patients. It is important to ensure systematic training and the introduction of at least 2 workouts into the daily routine.
Be sure to start the exercises on the healthy side and then alternate them with the affected limbs.
When fatigue occurs, a pause is necessary, several breathing cycles with exhalation stretching, and then you can continue the exercises.
To reduce spasm
Muscle spasticity is reduced when performing a special complex using the Bobath method. All movements are smooth and slow, repeated first three and then five times:
- the thumb is retracted to a right angle, in this position you need to stay for up to 3 minutes;
- stretching the remaining fingers of the hand;
- with the thumb extended and held, bend and straighten the hand, the whole arm at the shoulder;
- when fixing the thumb, the hand is abducted to the side and adducted (with the help of a therapeutic exercise instructor or a relative);
- stretch and pull your big toe towards you, fix the position for 2 minutes or longer until the muscles completely relax;
- Lie on your back, bend your knee. If this movement is difficult, then you should tap your hand under the knee. Pull the foot to the side and down by the big toe.
Bobath therapy
For upper limb
Movement in the arm is restored worse than in the affected leg. A feature of paralysis due to stroke is disruption of the deltoid muscle, which fixes the shoulder joint. When the patient begins to sit, stand or walk, the hanging arm can, under its own weight, cause stretching of the joint capsule and dislocation. To strengthen the shoulder use:
- moving the arm to the side;
- circular movements of the shoulders alternately and together;
- lifting the shoulders up and dropping down;
- abduction and dilation of the shoulder blades;
- sitting or standing with straightened arms, show open palms and turn the back of the hands (supination and pronation).
After the shoulder, they move on to the elbow joint (flexion, slow extension with fixation) and the wrist. You need to use your brush as often as possible, as it takes longer to recover.
To do this, you can use any position - lying, sitting or standing, first you should help yourself with your healthy hand.
Movements are carried out in all directions and planes - bending, side turns, circular rotations in both directions, imitation of screwing in a light bulb.
For developing legs
First you need to perform flexion and extension in the hip joint, knee and foot in a lying position. If the patient can stand, then add hip circles and knee rotations. The following complex is recommended in bed:
- bring your leg bent at the knee towards you and then straighten it completely;
- lying with straight legs, move the affected limb to the side and return to the starting position;
- sliding your heels on the bed;
- imitate riding a bicycle (on the weakened side, first with outside help);
- lift your legs one by one using a belt or rubber bandage.
Watch the video about exercises for developing legs:
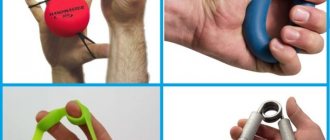
Recovery Equipment
In the rehabilitation process, special devices provide significant assistance; they are purchased in specialized medical equipment stores. They are designed taking into account movement disorders on one side of the body; more advanced models have feedback functions that help set an individual tinting regime.
The most common varieties are:
Manual exercise bike
Also, a variety of improvised means can be no less effective - an expander, a rubber bandage attached to a static object or closed in a ring, an ordinary mop stick, a ball, parallel bars, steps. An inflatable pillow is used to train balance, first while sitting and then standing. To develop a brush, plasticine and beans are useful, from which you need to lay out a figure.
Speech rehabilitation
The most intensive restoration of speech function is observed in the first six months from the onset of a stroke; it can last up to 2–3 years in case of extensive lesions or untimely treatment. Depending on which areas of the brain are affected, patients experience either a motor or sensory form of speech impairment (aphasia). In the first option, the patient:
- hears speech, perceives it by ear;
- understands words addressed to him;
- responds to requests;
- cannot pronounce a phrase or formulate a thought;
- Difficulties arise when reading and writing, so patients avoid them.
Watch the video about exercises for speech restoration with motor aphasia:
With sensory aphasia, the patient does not pay attention to the speech of others, his own words are incoherent and are not controlled by him. Reading is possible, but the meaning of the continuations is unclear, the writing skill is completely lost.
The speech of a person who has suffered a stroke is characterized by insufficient meaningfulness and gesticulation.
Since patients try to explain their thoughts to others, but they do not understand, this leads to irritability and resentment.
The following techniques are used for speech rehabilitation:
- cards with written letters, syllables and words from which you need to compose and read a sentence;
- encouragement to communicate - questions, requests, singing together, reciting poetry;
- listening to the patient’s favorite audio books with a retelling of their contents;
- viewing pictures and asking them to describe them.
If speech restoration is carried out at home, then it is important for relatives to maintain a friendly attitude towards even minor attempts to pronounce words, not to correct mistakes, but only to encourage patients. Overcoming a speech defect requires persistence and constant communication with the patient.
Watch the video about exercises for speech restoration with sensory aphasia:
Nutrition after stroke
Since in the vast majority of cases, patients with stroke have a tendency to atherosclerosis, it is recommended to avoid the use of:
- fatty meat (pork, lamb);
- meat broths;
- any animal fat;
- offal;
- cream and sour cream, cottage cheese containing more than 10% fat, cheese with more than 40% fat content;
- sausages, sausages, sausages, semi-finished products.
With high blood pressure, minimize the amount of table salt to 3 - 4 g per day. It is recommended to sharply reduce the content of white flour and sugar, alcohol, and caffeine in the diet.
The basis of dietary nutrition is fresh or boiled vegetables, fruits, cereals, wholemeal bread with bran.
The source of protein should be:
- boiled fish;
- boiled, minced or baked chicken or turkey meat;
- fermented milk drinks;
- low-fat varieties of cottage cheese and cheese;
- seafood.
Vegetable oil should be added to salads; frying with it is not recommended. You can also put no more than a tablespoon of sour cream or cream, 5 g of butter per day into the finished dish.
Folk remedies
The role of herbal medicines in recovery after a stroke is associated with the presence of the following medicinal properties:
| willow, meadowsweet, raspberry leaves and branches | |
| Improved memory and mental performance | ginkgo biloba, rhodiola, skullcap baicalensis |
| Preventing the formation of cholesterol plaques | pomegranate juice, garlic, sage, clover |
| Normalization of blood pressure | astragalus, cudweed, motherwort |
| Strengthening the vascular wall | chokeberry, black currant, rose hip |
There is a recipe for collecting from plants, which has undergone clinical trials; patients were observed for 8 years after a stroke.
It was noted that in the group of patients who took medications (antiplatelet agents, nootropics, statins) and additionally drank a herbal decoction 2 times a day, the risk of repeated acute circulatory disorders significantly decreased, almost all patients noted an improvement in their well-being - headaches, dizziness disappeared or decreased, physical and mental performance has increased.
To prepare a decoction you need to take the following parts of plants (in tablespoons of crushed raw materials):
- roots – licorice 8, ginger 2, eleutherococcus 4, calamus 2, valerian 2;
- flowers – meadowsweet 4, hawthorn 4, calendula 2;
- leaves – birch 4, nettle 4, blueberry 2, sage 2;
- fruits – chokeberry 2, coriander 2;
- cudweed grass 3;
- corn silks 2.
A tablespoon of the mixture is poured into a glass of boiling water and heated in a water bath for 15 minutes, then cooled to room temperature, the broth is filtered.
You need to drink it warmed up 30 minutes before meals. If medications are prescribed, then the break between them and herbs should be at least an hour. Reception lasts a month, then a 2-week break.
This treatment takes a long time.
We recommend reading about drug treatment for stroke. From the article you will learn what medications are used for what type of stroke, as well as about drugs to prevent recurrence of the pathology.
Read more about nutrition after a stroke here.
Recovery of patients after ischemic and hemorrhagic stroke takes from several months to several years. Therefore, it is important to know what techniques can be used at home.
To improve movements in the limbs, therapeutic gymnastics is used, which is supplemented with exercises on simulators. Speech rehabilitation includes training in auditory and visual perception of words, and encouragement to communicate. A necessary condition for successful treatment is a properly selected diet and a combination of drug therapy with herbal preparations.
Source: https://CardioBook.ru/reabilitaciya-posle-insulta-v-domashnix-usloviyax/
What are the chances of full recovery after a stroke?
According to statistics, only 10% of people who have had a stroke fully recover in Russia. We are talking about those who have re-mastered not only the minimum program, but also professional skills. The rest most often become disabled, 25% of whom require care in the form of a permanent caregiver.
After discharge, the rehabilitation period continues. The chance of a full recovery increases when a person after a stroke receives timely psychological support, as well as the help of loved ones who are ready to go through this difficult period with the patient, continuing treatment at home. Only daily training and focus on results give a positive prognosis.
Article design: Mila Friedan
Recovery Equipment
In the rehabilitation process, special devices provide significant assistance; they are purchased in specialized medical equipment stores. They are designed taking into account movement disorders on one side of the body; more advanced models have feedback functions that help set an individual tinting regime.
The most common varieties are:
- exercise bike for legs;
- treadmill with side rails;
- manual exercise bike.
Manual exercise bike
Also, a variety of improvised means can be no less effective - an expander, a rubber bandage attached to a static object or closed in a ring, an ordinary mop stick, a ball, parallel bars, steps. An inflatable pillow is used to train balance, first while sitting and then standing. To develop a brush, plasticine and beans are useful, from which you need to lay out a figure.